Audio to Clipboard
What It Does
This script enables you to to record audio and have the result in your clipboard so you can directly paste it to Anki or another folder.
This is really helpful when creating Anki cards with audio data.
Create the Application
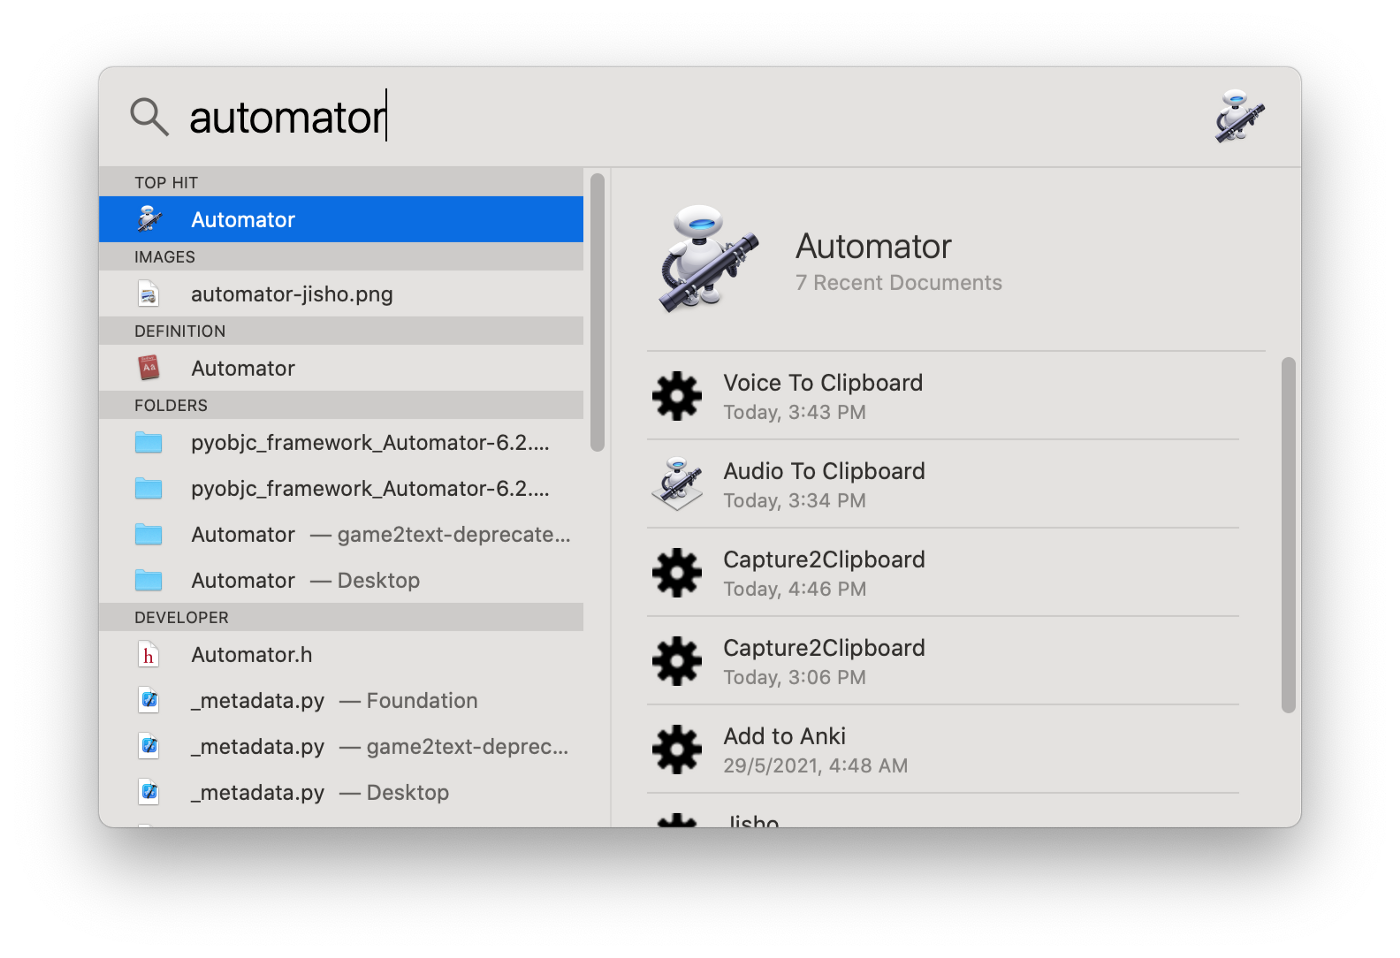
Launch Automator by pressing Command⌘+Space for Spotlight, typing in automator, and hitting Enter.
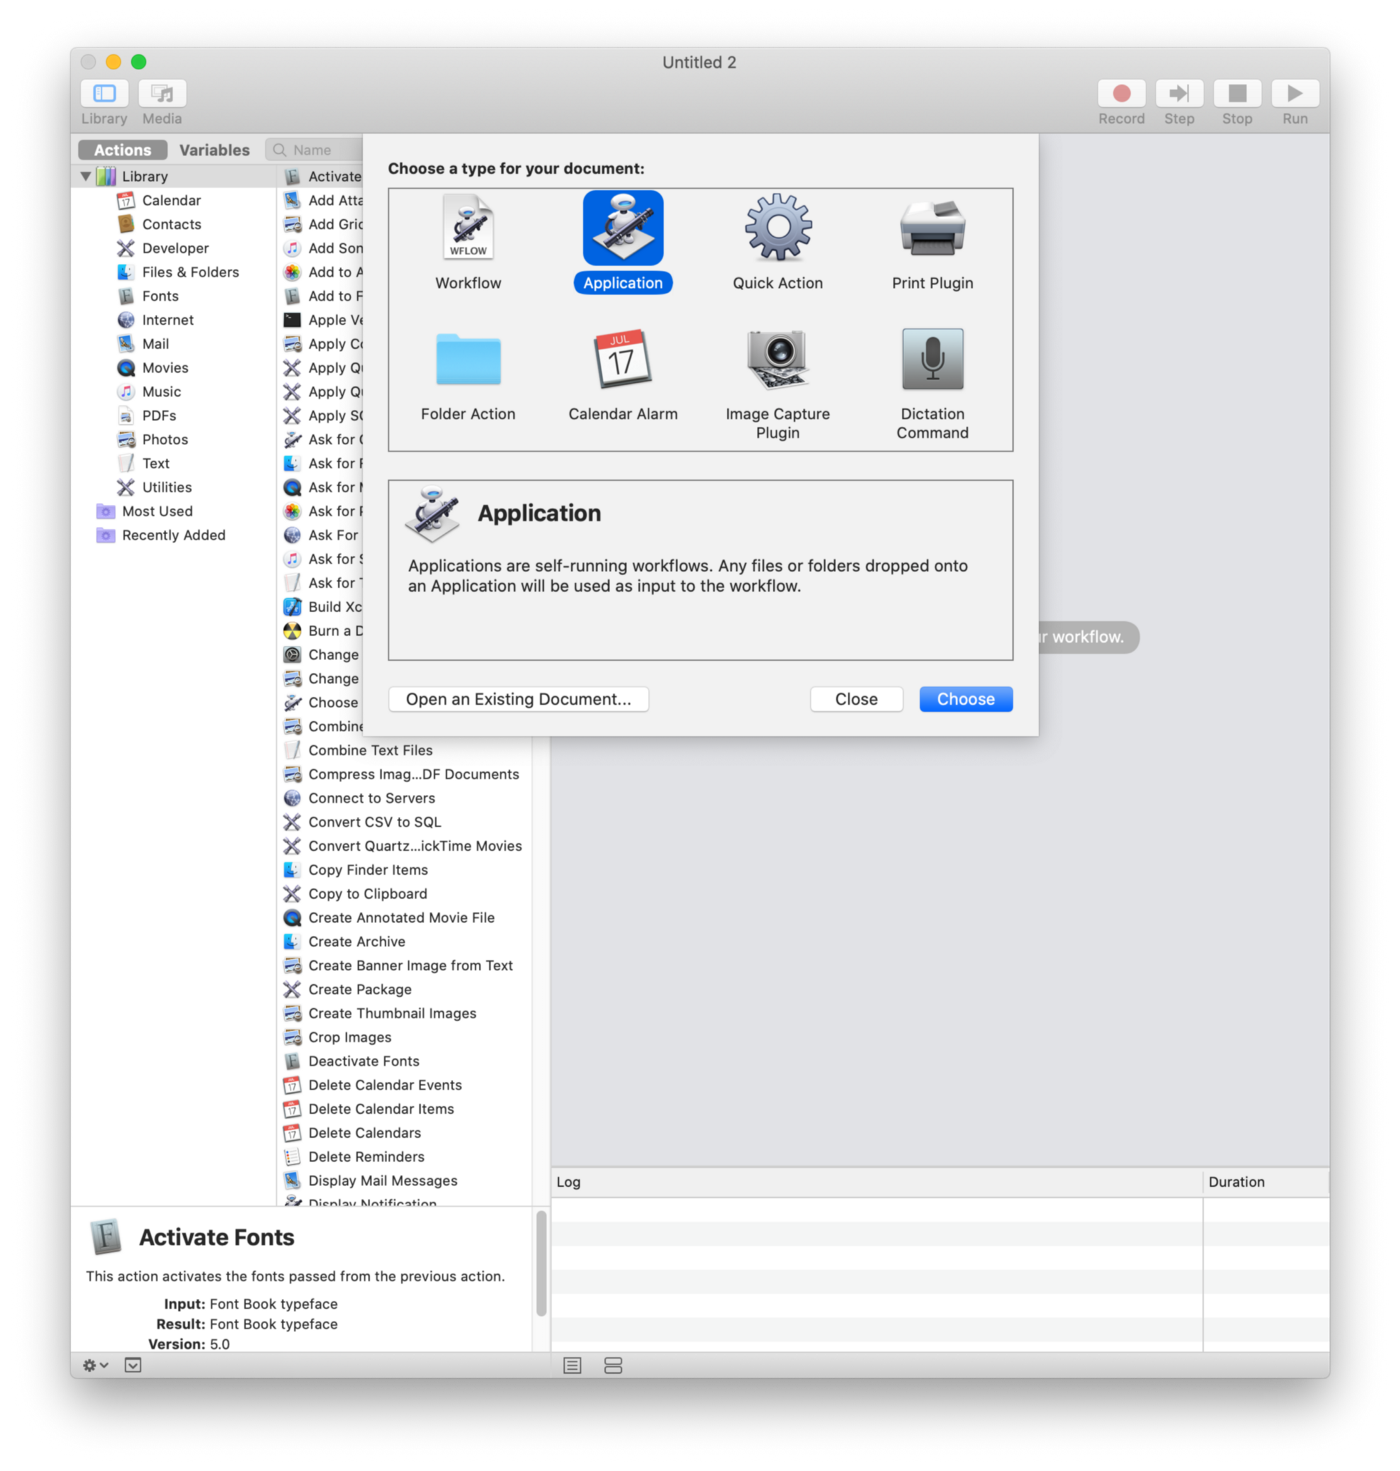
Create an Application.
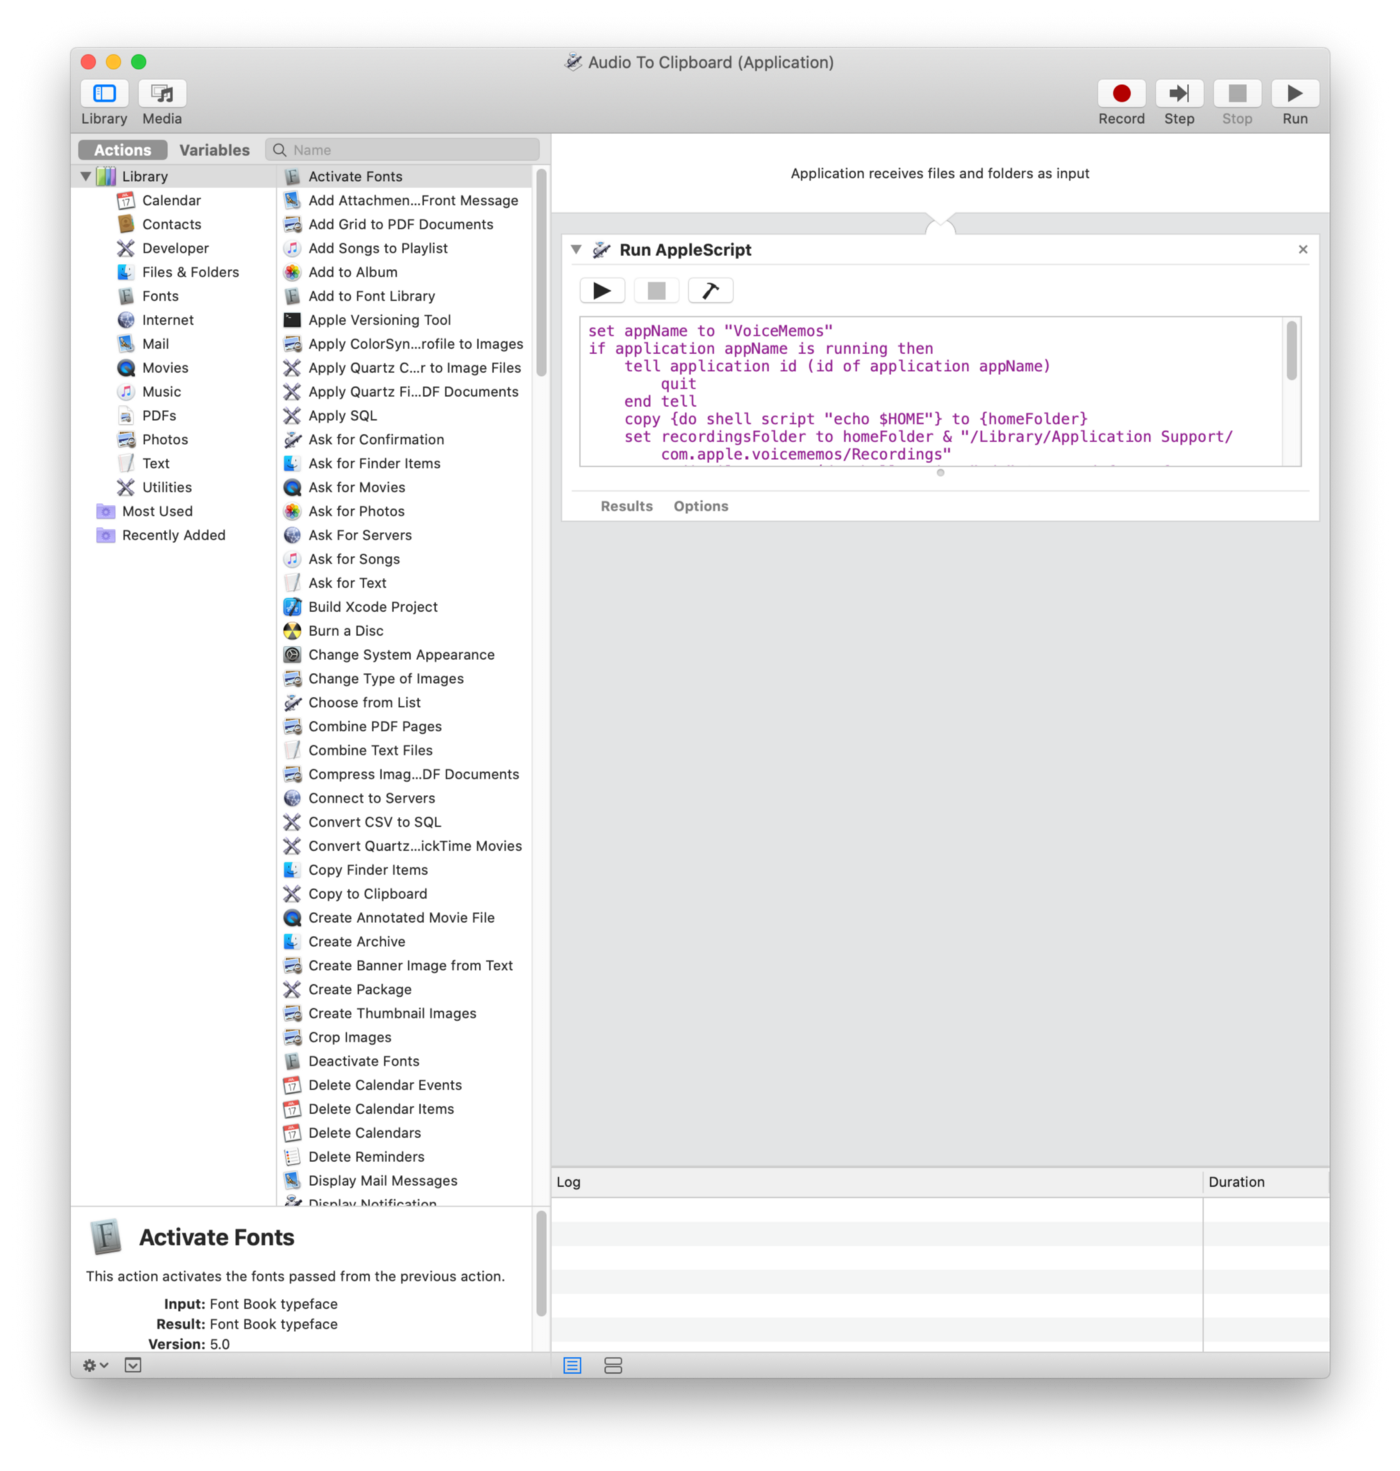
Add a Run AppleScript action by searching for applescript in the upper left search bar and double clicking the Run AppleScript item.
Paste the following script to the action.
set appName to "VoiceMemos"
if application appName is running then
    tell application id (id of application appName)
        quit
    end tell
    copy {do shell script "echo $HOME"} to {homeFolder}
    set recordingsFolder to homeFolder & "/Library/Application Support/com.apple.voicememos/Recordings"
    set audioFileName to (do shell script "cd " & quoted form of recordingsFolder & " && ls -ltr -A1 | grep m4a | tail -1")
    set the clipboard to POSIX file (recordingsFolder & "/" & audioFileName)
else
    tell application id (id of application appName) to activate
    tell application "System Events"
        set limit to 10
        set counter to 0
        repeat
            if exists window 1 of process appName then exit repeat
            if (counter > limit) then exit repeat
            set counter to counter + 1
            delay 1
        end repeat
        perform action "AXRaise" of window 1 of process appName
        keystroke "n" using command down
    end tell
end if
Press Command+S and name the application as Audio To Clipboard.
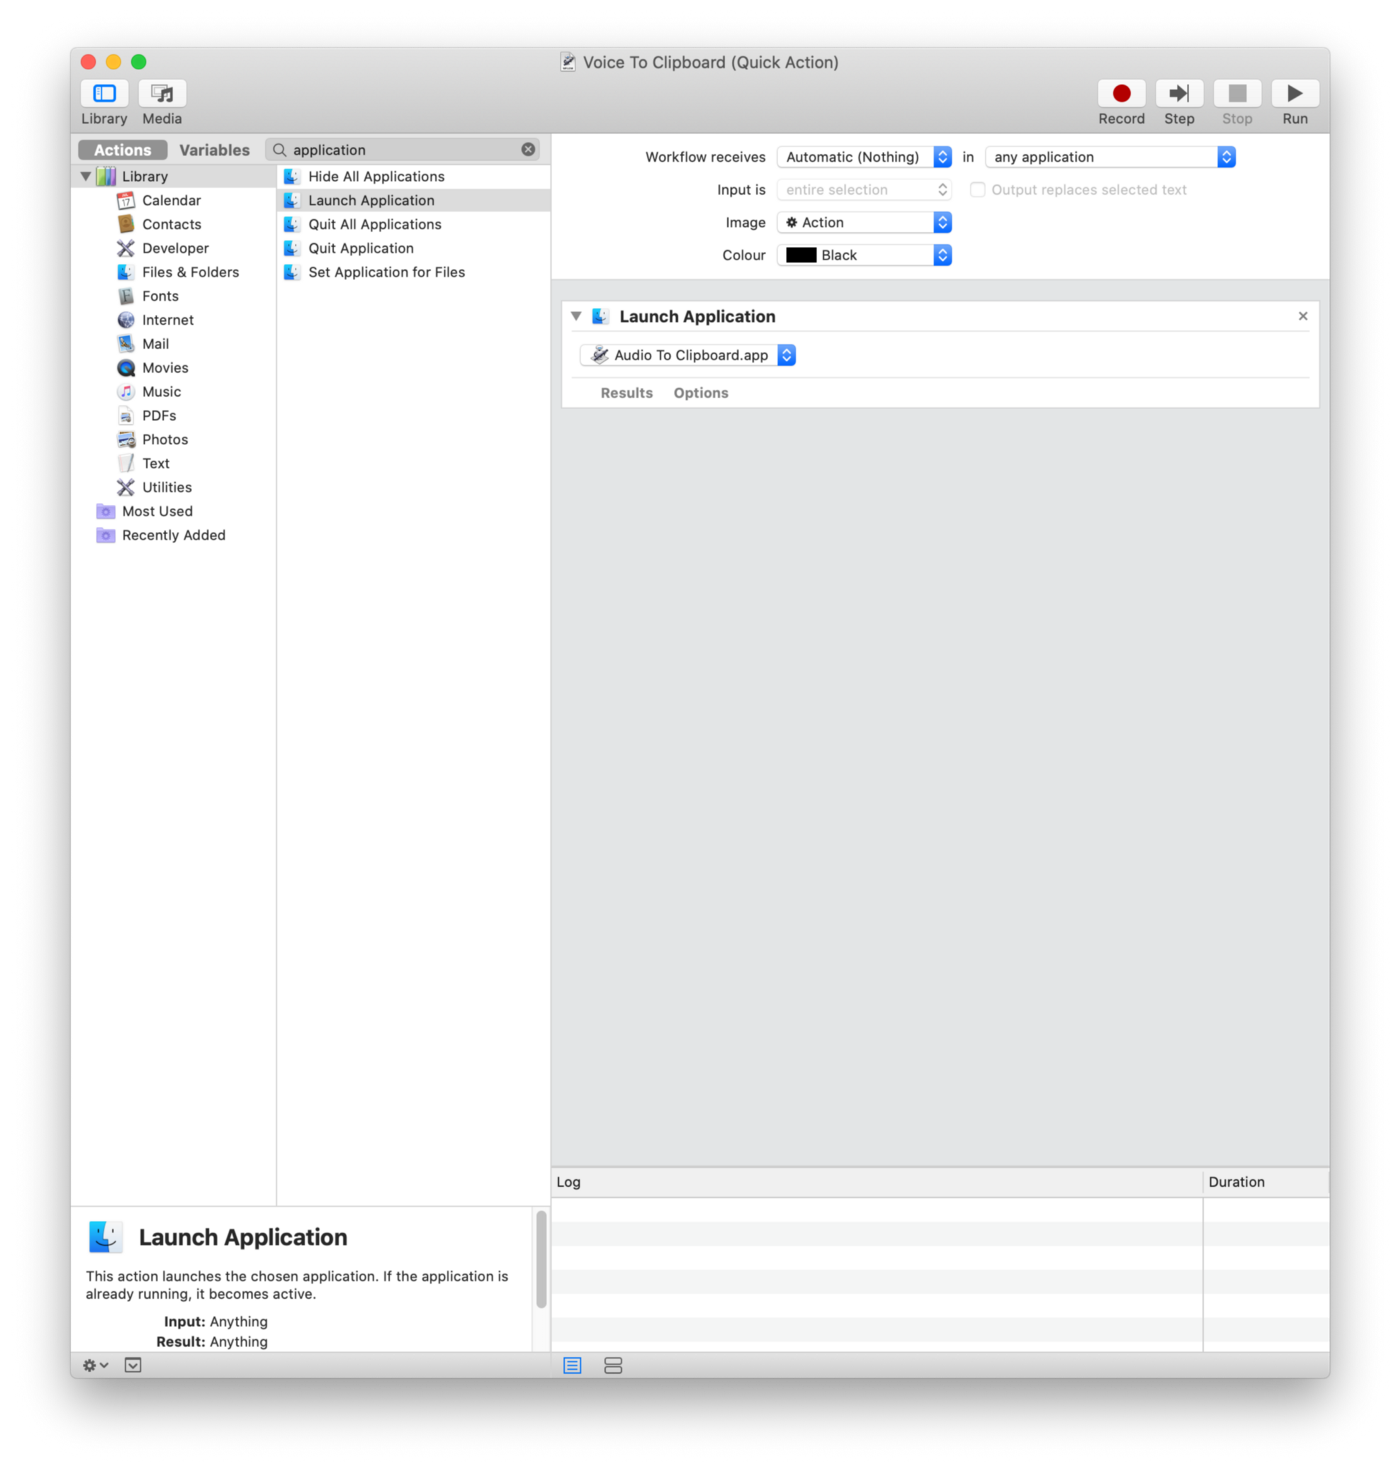
Create the Quick Action
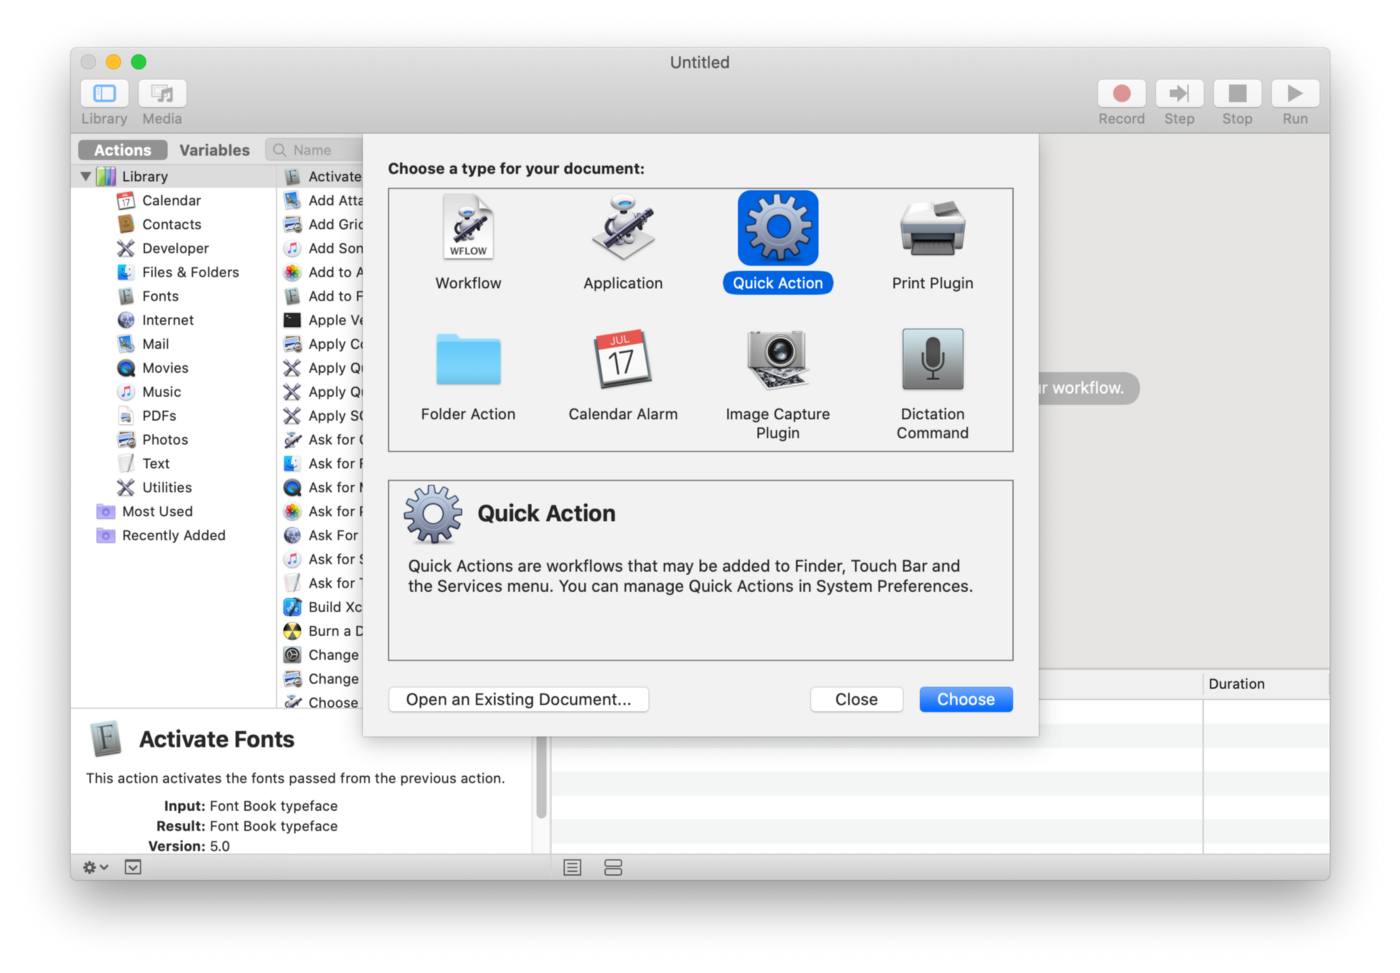
While in Automator, click File > New and create a new Quick Action.
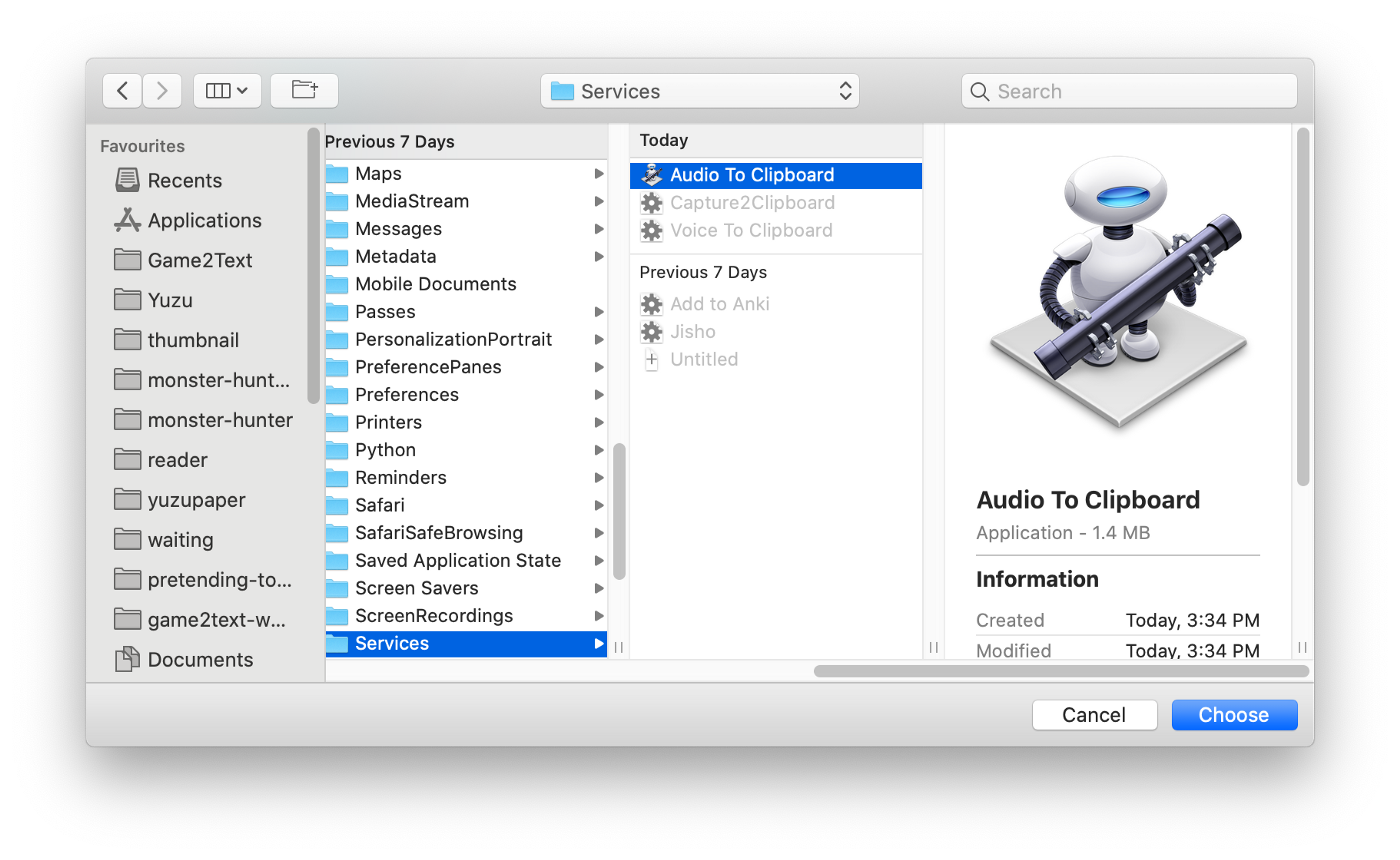
Add Launch Application and select the newly created Audio To Clipboard.app located in ~/Library/Services folder.
Hit Command+S and name it as Voice To Clipboard.
Info
Type in the file name in the top right Search bar if you’re having trouble locating the application
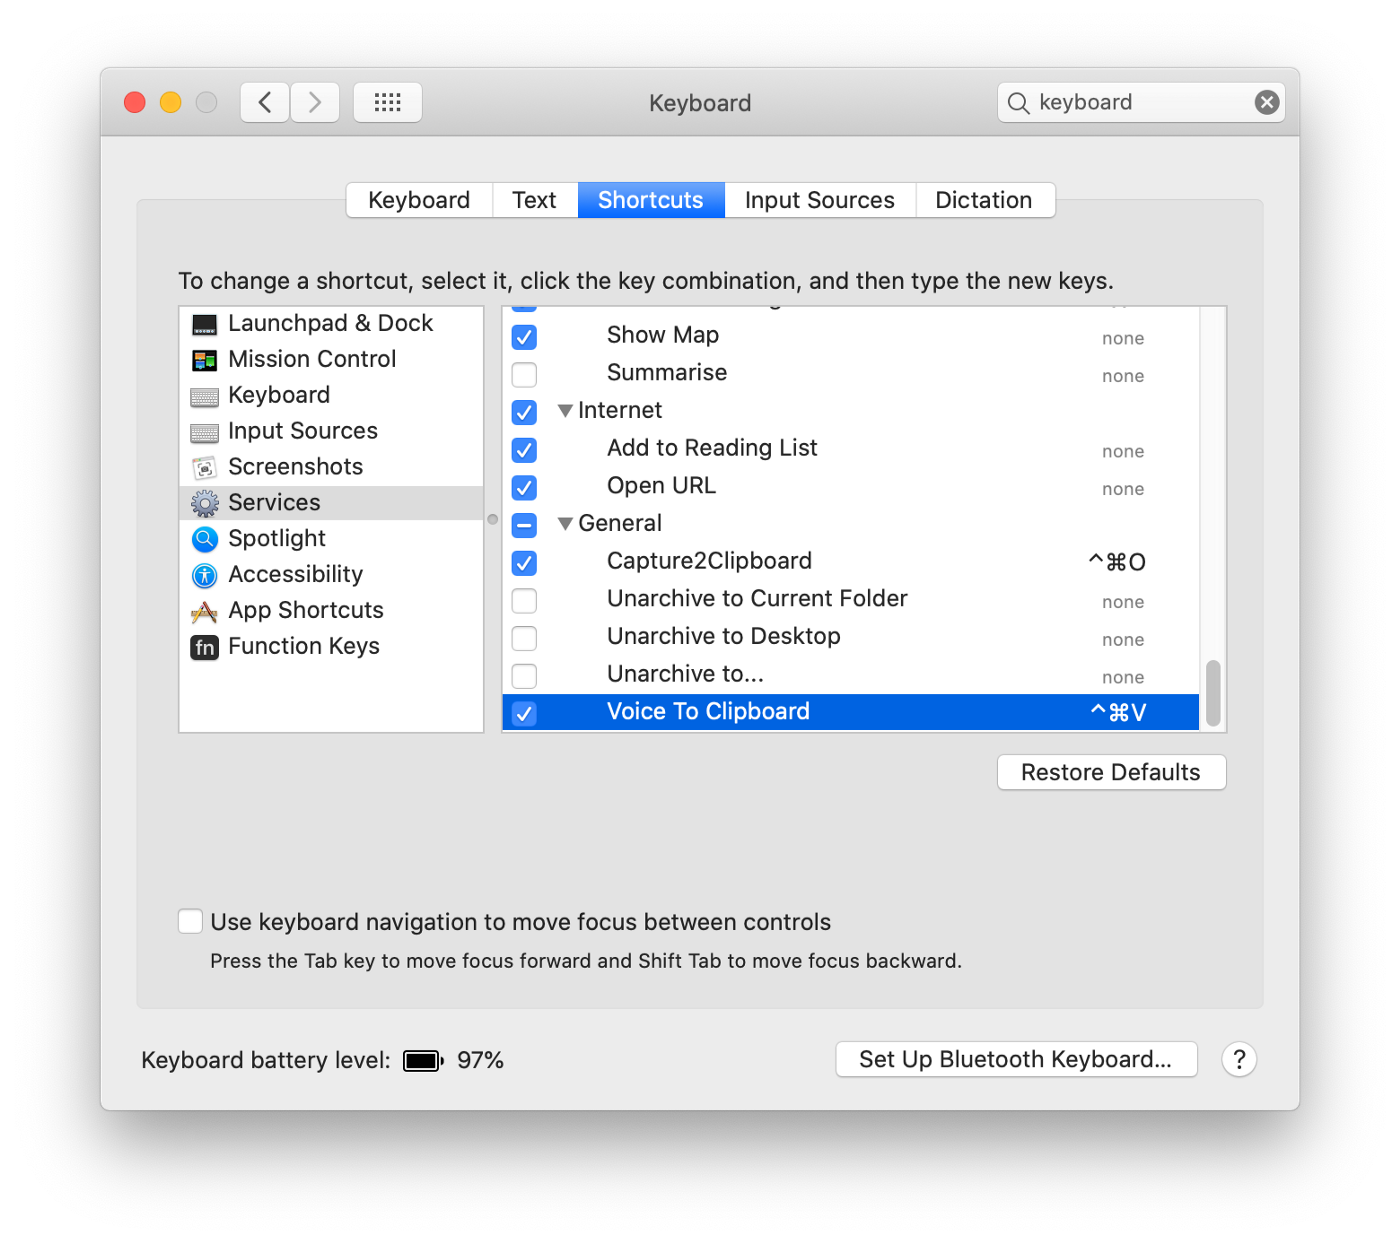
Then go to System Preferences > Keyboard > Shortcuts. Select Services from the sidebar and find the service Voice To Clipboard. Add a shortcut by double clicking (none).
I use the hotkey Command+Control+V (^⌘V).
Info
Command+Control+A-Z are usually available for your custom global shortcuts, with Command+Control+F being a notable exception.
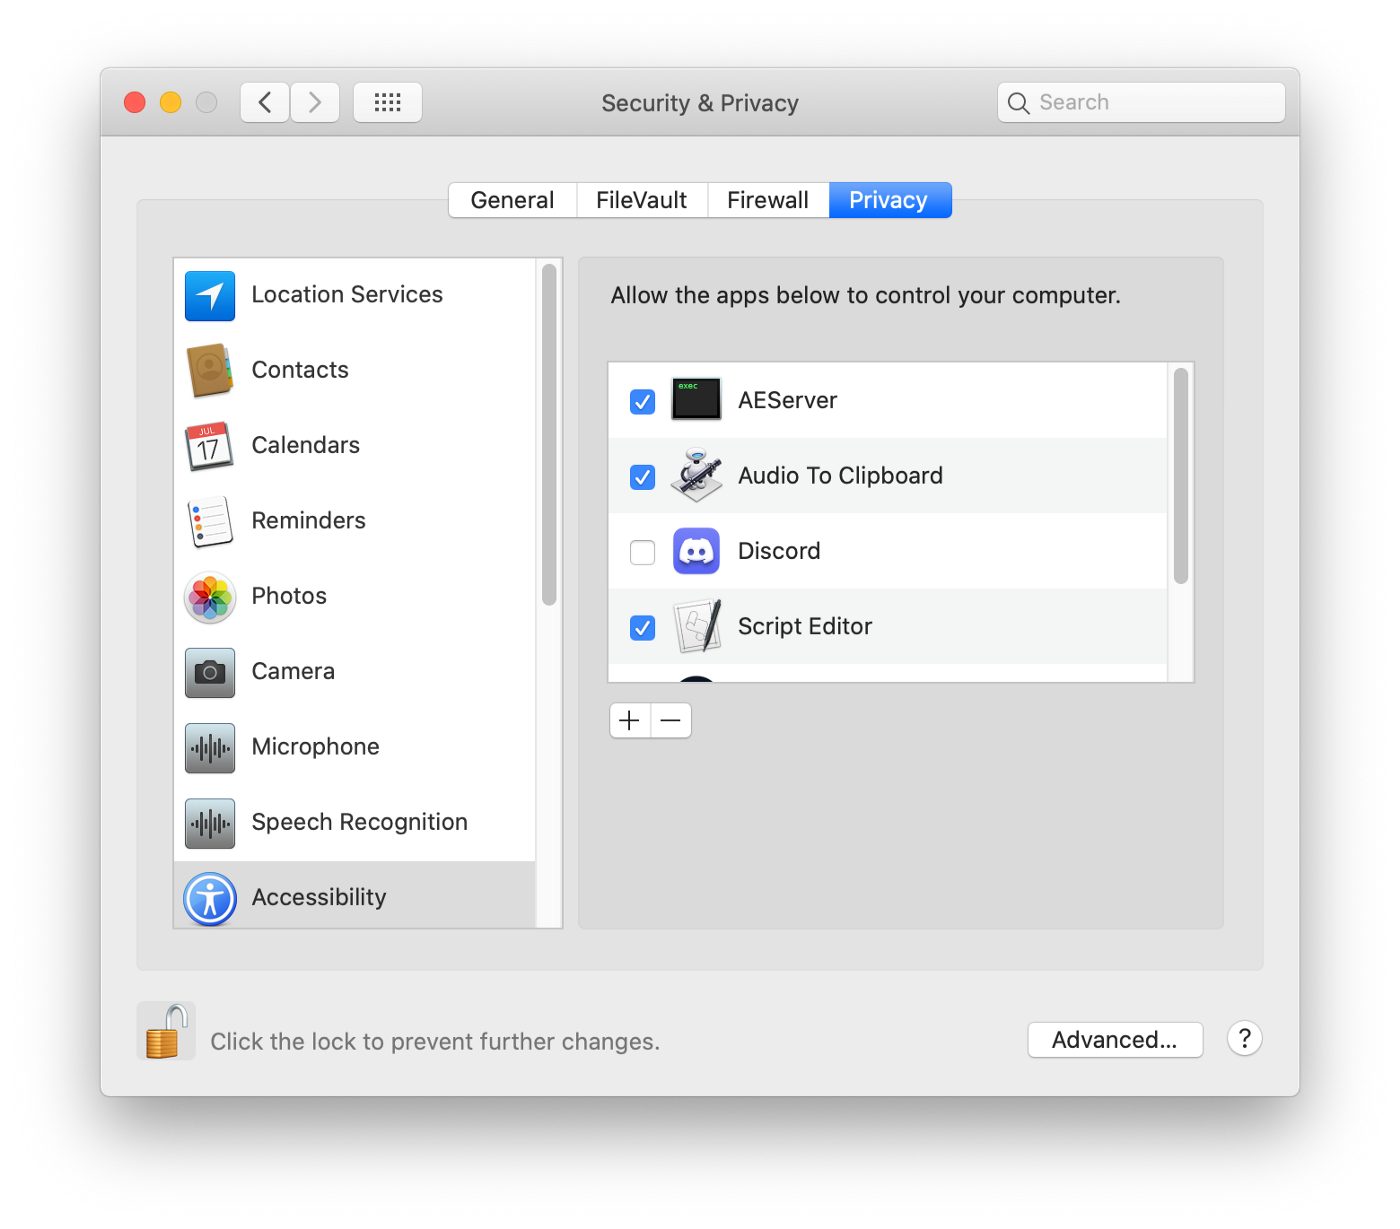
When you run the script for the first time through the keyboard shortcut, you may need to give Accessibility permission to Audio To Clipboard.
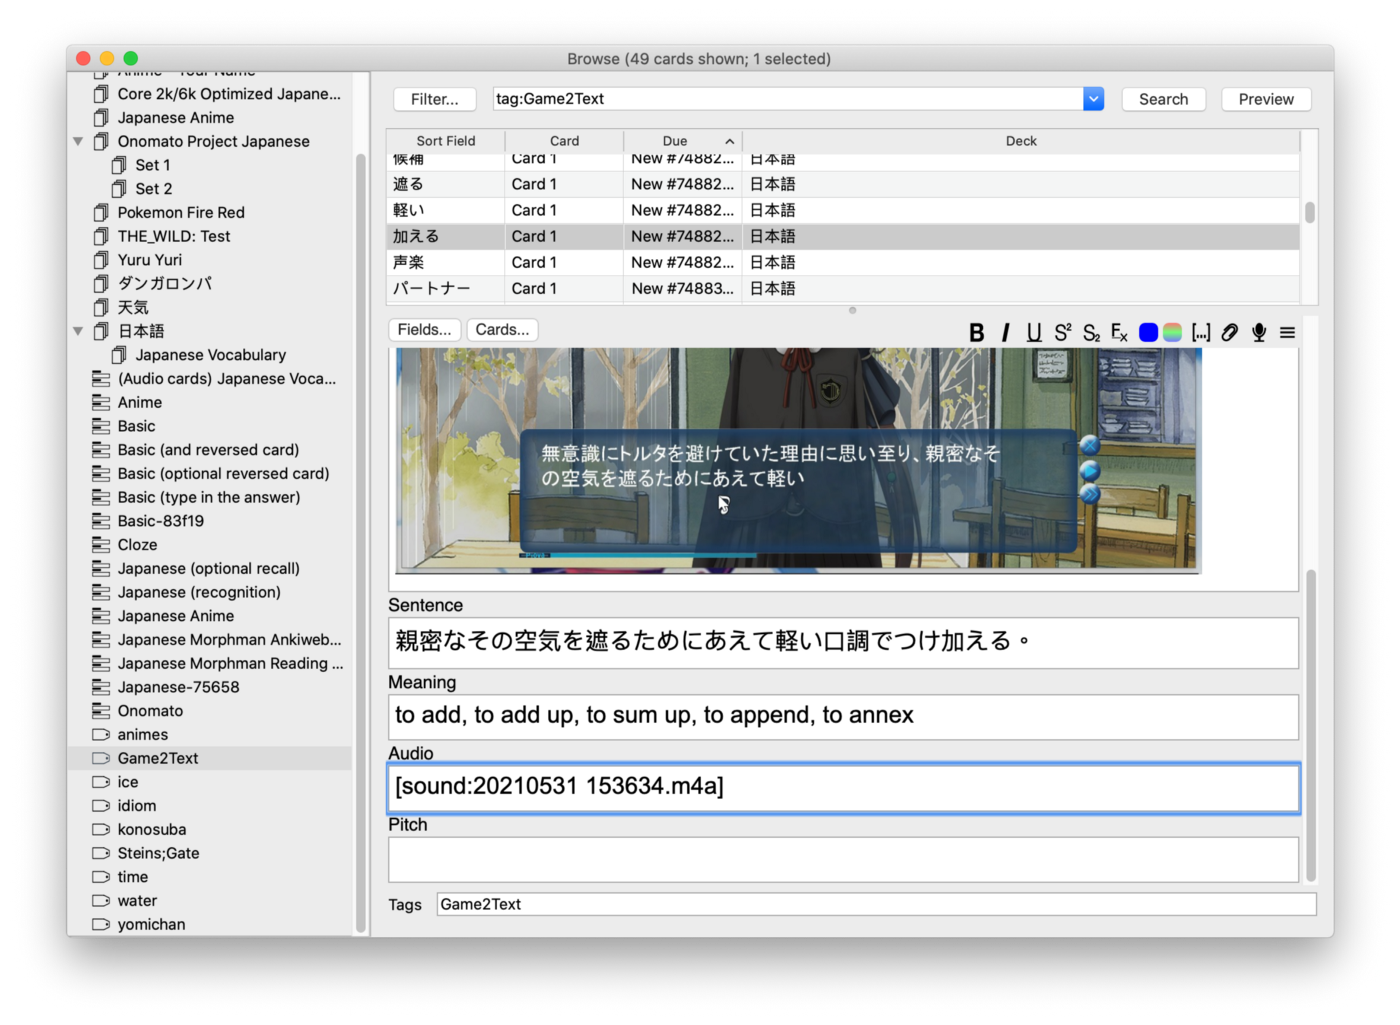
Once permission is given, you can type in the shortcut (^⌘V) anywhere on your Mac to record audio and press Command+V to directly paste it to the Anki Audio field.
To record sound going through your browser on Netflix or in a game, you would also need to set up a Virtual Audio Cable.
Recording System Audio through BlackHole
Install Blackhole, a virtual audio cable to pass system sound as a microphone.
If you have brew installed, you can just type the following command to Terminal.
brew install blackhole-16c
Add Multi-Output Device and set Blackhole as input
On your desktop type command+space to launch Spotlight and type in midi and press enter to launch Auto MIDI Setup.
In Auto MIDI Setup, click on the bottom left corner + icon and add a new Multi-Output Device. In the list of devices, check Blackhole 16ch and also check your speakers or headphone.

Type command-space to launch Spotlight again and type in sound to launch Sound Settings.
On the Output tab, select Multi-Output Device and on the Input tab select BlackHole 16ch.


System sound coming from your browser or your game will now become the default microphone source.